WarpConduit Computing

  • Quick Tips
  • Web Design & Development
  • WordPress Plugins
  • Home
  • Passphrase Generator
  • Password Generator
  • About
  • Contact

How to Enable PHP 5.3 on HostMonster Shared Web Hosting

January 27, 2012 by Josh Hartman

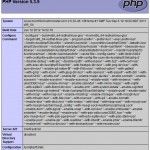
phpinfo

Click image to view full phpinfo() output PDF

You heard it right, you can now run PHP 5.3 applications on HostMonster. I’ve only testing this on HostMonster, but I would assume the same applies to BlueHost.

Simply add this line to the beginning of your website’s root .htaccess file:

AddHandler application/x-httpd-php53 .php

After making this change you can test it using phpinfo() and it will show you the version at the top, and as of the time of this post Hostmonster is keeping right up to date, running version 5.3.9.

This is exciting news for Zend programmers and other PHP developers ready for the upgrade. Enjoy!
 

Filed Under: Web Design & Development Tagged With: htaccess, php

Enabling Gzip Compression of PHP, CSS, and JS Files Without mod_deflate

October 23, 2010 by Josh Hartman

Normally you can easily enable Gzip compression using mod_deflate by adding the following lines to your .htaccess file:


AddOutputFilterByType DEFLATE text/html text/plain text/xml text/css text/javascript application/javascript application/x-javascript

But for those of you on shared hosts that don’t allow the mod_deflate module and run PHP in CGI/FastCGI mode you can’t go with the easy method.

So, to serve up your PHP, CSS, and JS files you can try the following method.

Note 1: Your shared web hosting account must support custom php.ini and .htaccess files.

Note 2: Be careful when mixing this solution with other cache/compression applications.

Step 1: PHP Configuration

Add or modify the following lines in your custom php.ini file:

output_handler = Off
zlib.output_compression = On
zlib.output_handler = ob_gzhandler

Now this will take care of gzipping all PHP files.

Step 2: .htaccess Configuration

Add the following lines to the bottom of a .htaccess file in the root of your website.


RewriteEngine On
RewriteRule ^(.*\.js) gzip.php?type=js&file=$1
RewriteRule ^(.*\.css) gzip.php?type=css&file=$1

This will redirect all requests for .css and .js files through gzip.php, which we will create in the next step.

Step 3: File Processing PHP Script

The following PHP script will inherently use the PHP compression you’ve already enabled and also add headers to your files take advantage of your client’s browser cache to make subsequent loads faster.

Create a file named gzip.php in your website’s root and add the following lines to it:


Great! With these steps in place your css and javascript files will be processed by gzip.php and output using PHP’s gzip compression library (zlib).

This method can be extended to more filetypes by adding to the allowed file types in gzip.php and adding more lines to your .htaccess file.

Filed Under: Web Design & Development Tagged With: css, deflate, gzip, htaccess, javascript, php

RewriteRule and Trailing Slashes

May 7, 2010 by Josh Hartman

Just a quick post today, i needed to redirect a URL with and without a trailing slash to the same destination, but didn’t want to create two separate rules, so I did some searching and found that it is very simple.

RewriteCond %{HTTP_HOST} ^.*$
RewriteRule ^video(/)?$ http://video.somedomain.com [R=301,L]

The (/)? is the key to matching a url with or without a trailing slash.

Filed Under: Web Design & Development Tagged With: htaccess, rewriterule, slashes

Redirecting to www with htaccess

September 25, 2009 by Josh Hartman

This is useful for SEO so all your ranking gets added to one url and not divided between two.

Use the following example to create a redirect from any incoming domain to your www sub-domain:

<IfModule mod_rewrite.c>
RewriteEngine On
RewriteCond %{HTTP_HOST} !^www.example.com [NC]
RewriteRule ^(.*)$ http://www.example.com/$1 [R=301,L]
</IfModule>

To use this method you need have mod_rewrite installed and enabled on Apache web server and you need to be able to create a custom .htaccess file.

A few things to note, the NC means that the regex is not case sensitive, R=301 means that this redirect will return an HTTP status code of 301 Permanent Redirect (search engine friendly), and the L after that means that no further rule processing should be done.

Filed Under: Web Design & Development Tagged With: htaccess, redirect

Connect

  • Facebook
  • GitHub
  • RSS
  • Twitter
  • YouTube

Recent Posts

  • Extremely Useful Applications for Web Development and IT Tasks
  • Installing BookStack Wiki on cPanel Shared Hosting
  • Media (MIME) Type Reference List

Tags

automatic benchmark cbc cipher class comparisons cpanel credit memo css decrypt encrypt font gzip htaccess html image increment javascript jquery list magento mcrypt mysql number old opencart order php profiling random redirect repository rijndael shipment software strict ubuntu url wincachegrind windows windows 7 wordpress xampp xdebug xss

Blogroll

  • CodeIgniter
  • Fusion Forward
  • jQuery
  • Nettuts+
  • Smashing Magazine

© 2023 WarpConduit Computing. All Rights Reserved.